Set up Azure AD as your SAML Identity Provider
Here's a walk-through of setting up Azure AD as your SAML Identity Provider. This allows your team to log into Zenduty without a new email/password combination.
-
Log in to Zenduty as an account owner. In another tab, log into Azure as an administrator.
-
In the Zenduty tab, click on your name in the top right corner, which will reveal a dropdown with your account's domain name. Copy your account domain name for later use.

-
Go to your Azure portal browser tab. Navigate to Azure Active Directory from the left vertical panel. Navigate to Enterprise Applications from the left vertical panel. Click on New application.

-
Click on Create your own application. Name your application as 'Zenduty AD' or any name that you prefer. Select Integrate with any other application you don't find in the gallery from the radio options.


-
In the Getting Started area, click on Setup single sign on.

-
Click on SAML.

-
Click on Edit in the Basic SAML Configuration area.

-
In the Identifier(Entity Id) input box, enter the value - https://www.zenduty.com

-
In the Reply URL(Assertion Consumer Service URL) input box enter the value - https://www.zenduty.com/api/account/saml/acs/
-
In the Relay State input box, enter your Zenduty account domain name that you copied in step 2. Click on Save.
-
Click on Edit next to User Attributes & Claims. You need to create three new claims.


-
For the first claim, click on Add new claim(Note: in case the Add new claim button is greyed out, try refreshing your page). In the Name field, enter the value email. In the Source radio options, select Attribute. In the Source Attribute dropdown, search for 'user.mail'.

-
For the second claim, click on Add new claim. In the Name field, enter the value first_name. In the Source radio options, select Attribute. In the Source Attribute dropdown, search for 'user.givenname'.

-
For the third claim, Click on Add new claim. In the Name field, enter the value last_name. In the Source radio options, select Attribute. In the Source Attribute dropdown, search for 'user.surname'.


-
Navigate back to the Single Sign-on page. In the SAML Signing Certificate area, click on the Download link next to the Certificate (Base64) text. Open the downloaded file.

-
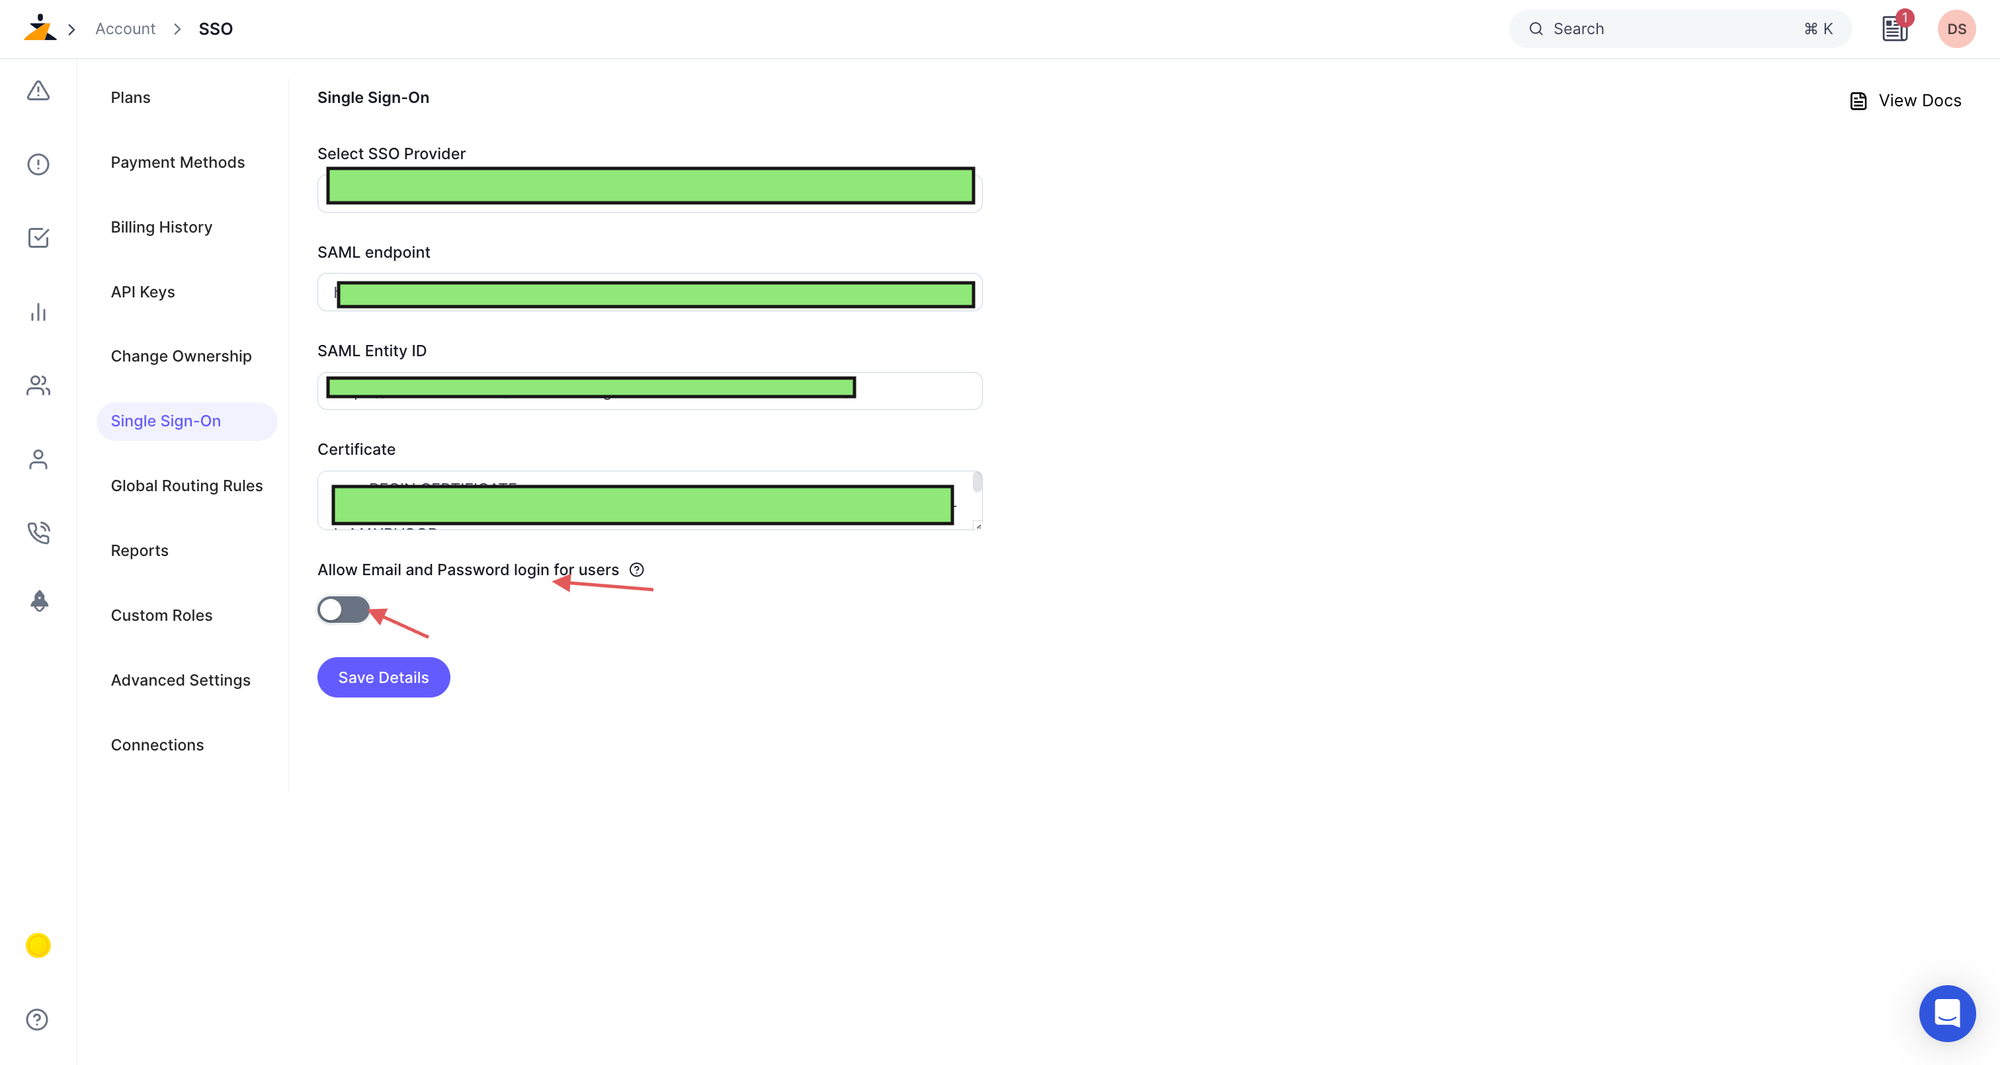
Go to the Zenduty tab. Navigate to the Account page from your top right dropdown. Navigate to the Single Sign-on page from the left vertical panel. From the Select SSO Provider dropdown, select Azure Active Directory.


-
For the SAML endpoint input box, go back to your Azure tab, and under Set up Zenduty AD copy the Login URL value and paste it into the SAML endpoint input box in the Zenduty tab.

-
For the SAML Entity ID input box, go back to your Azure tab, and under Set up Zenduty AD copy the Azure AD Identifier value and paste it into the AML Entity ID input box in the Zenduty tab


-
For the Certificate input box, open the Base64 certificate downloaded in Step 15 in a text file, copy the certificate text and paste into the Certificate input box.

-
Click on Save Details.
-
Navigate back to your Azure Single Sign on tab. Click on Users and groups on the left vertical navigation panel. Click on Add user/group. Add the users you want to provide access to Zenduty.

-
To test the setup, logout from Zenduty. Go back to the Single Sign-on page from the left vertical navigation panel in your Azure AD tab. Click on Test this application; on the top. Click on Sign in as current user. Authenticate your Azure account. You should be redirected to your Zenduty page.

-
For the final test, logout of Zenduty. In your browser, navigate to the Zenduty Login Page. Click on Log in with your Identity Provider. In the domain input box, enter your account domain name(copied from Step 2). Click on continue. You will be redirected to your Azure AD login. Authenticate your Azure account. You will be redirected to your Zenduty dashboard.
Your Azure AD integration is complete!
Disable password login for non-admin users
To disable password login for non-admin users, you can toggle the "Allow Email and Password login for users" setting in the SSO configuration