Set up Okta as your SAML Identity Provider
Here's a walk-through of setting up Okta as your SAML Identity Provider. This allows your team to log into Zenduty without a new email / password combination.
-
Log in to Zenduty as an account owner. In another tab, Log into Okta as an administrator.
-
In Zenduty, click on your name in the top right corner, which will reveal a dropdown with your account's domain name. Copy your account domain name for later use.

-
Go to your Okta admin dashboard. Click on Applications. Click on Add Application and search for Zenduty in the Okta application marketplace. Click on Add next to Zenduty.

-
Click on the Zenduty application in Okta. Click on the Sign On tab. Click on Edit in the Settings section.
-
In the Default Relay State box, enter the Zenduty account subdomain you copied in Step 2. For Application username format, Select Email.

-
Click on the View SAML Setup Instructions from the right. This will open a new tab which will contain three values which you need to temporarily copy in a text editor for the next step - SAML endpoint, SAML Entity ID and Certificate.

-
Assign users to the Zenduty application on Okta.
-
Go back to the Zenduty tab. On the top right corner, click on the dropdown under your name and click on Account. On the left panel, click on Single Sign On.
-
In the SSO form, select Okta SSO under Select SSO Provider.
-
In SAML endpoint input, paste the SAML endpoint you saved from Step 6. In SAML Entity ID input, paste the SAML Entity ID from Step 6. In the Certificate input, paste the Certificate copied earlier.

-
Click on Save Integration to complete your SSO setup.
-
To test SP-initiated SSO, logout of your Zenduty account and click on Login. Click on Login with your identity provider. Enter your account domain name and click on Continue. Authenticate your Okta credentials to login into Zenduty.
-
To test iDP-initiated SSO, logout of your Zenduty account. Login to your Okta account and from the application list, click on Zenduty. You will be logged into Zenduty.
Disable password login for non-admin users
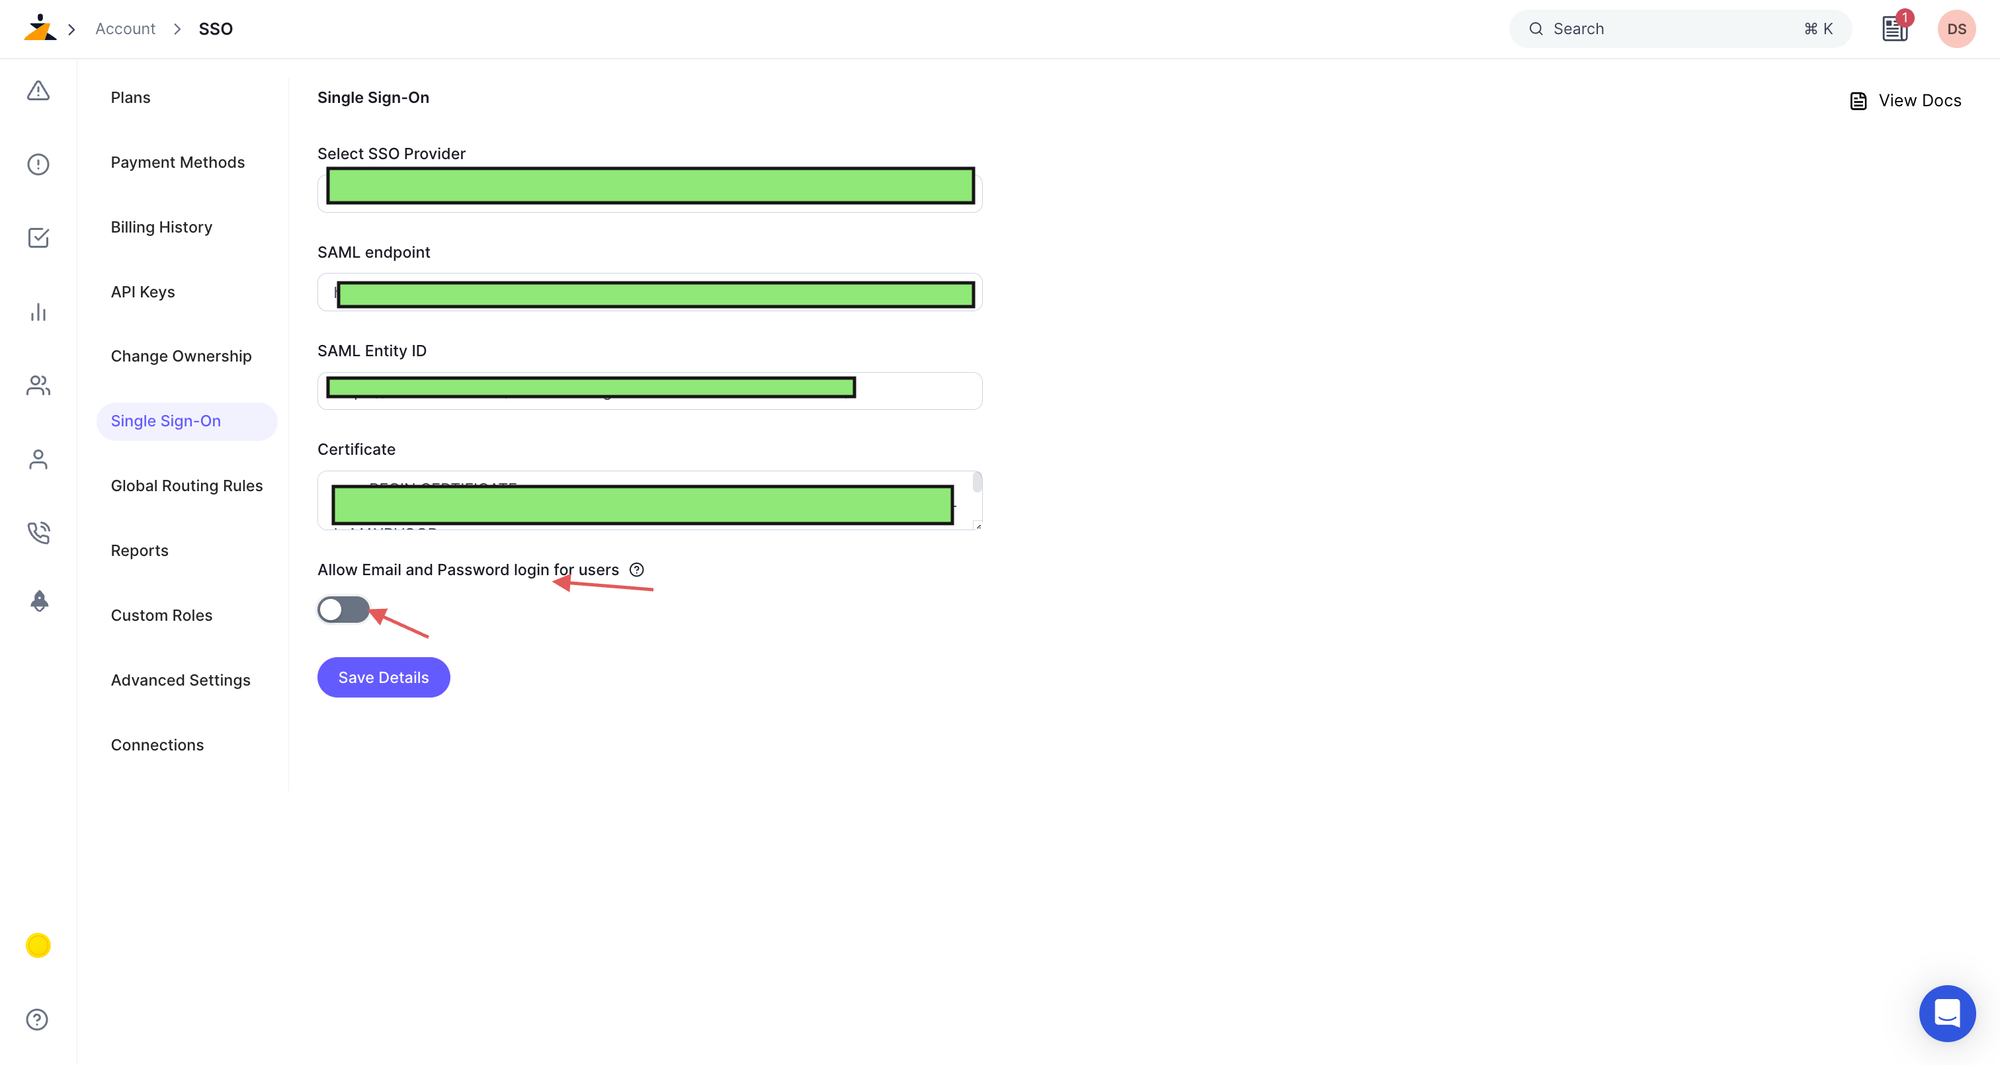
To disable password login for non-admin users, you can toggle the "Allow Email and Password login for users" setting in the SSO configuration
