Amazon EventBridge Integration Guide
Amazon EventBridge is a serverless service that uses events to connect application components together, making it easier for developers to build scalable event-driven applications. EventBridge enables you to build event-driven architectures that are loosely coupled and distributed.
What can Zenduty do for Amazon EventBridge users?
With EventBridge's Integration, Zenduty sends new EventBridge alerts to the right team and notifies them based on on-call schedules via email, text messages(SMS), phone calls(Voice), Slack, Microsoft Teams and iOS & Android push notifications, and escalates alerts until the alert is acknowledged or closed. Zenduty provides your NOC, SRE and application engineers with detailed context around the EventBridge alert along with playbooks and a complete incident command framework to triage, remediate and resolve incidents with speed.
You can also use Alert Rules to custom route specific EventBridge alerts to specific users, teams or escalation policies, write suppression rules, auto add notes, responders and incident tasks.
To integrate AWS EventBridge with Zenduty, complete the following steps:
In Zenduty:
-
To add a new AWS EventBridge integration, go to Teams on Zenduty and click on the team you want to add the integration to.
-
Next, go to Services and click on the relevant Service.
-
Go to Integrations and then Add New Integration. Give it a name and select the application AWS EventBridge from the dropdown menu.
-
Go to Configure under your integrations and copy the Webhook URL generated.
Via SNS:
-
Login to your AWS account. Go to your SNS dashboard. On the left panel, click on Topics. Click on Create topic. For topic and display names, enter Zenduty.

-
Go back to the SNS dashboard and click on Create Subscription.
-
In the Topic ARN, choose the topic created in Step 1. Select the protocol as HTTPS. In the endpoint field, paste the Webhook URL you copied earlier.
- Keep the Enable raw message delivery as unchecked.

-
Click on Create subscription to find a list of your subscriptions. Refresh this page to confirm.
-
Go to the AWS EventBridge dashboard. On the left panel, click on Rules. Click on Create rule. For name enter Zenduty and description as per your preference.

-
In the Build event pattern step, choose AWS events or EventBridge partner events as Event source. In the Event pattern select AWS services and Event type for which you would like notifications for.


You can choose and enter a few specific operation(s) for which you would like notifications for. We highly recommend that you provide specific operation event type to avoid noise.
-
In Select targets, choose AWS service as target types, choose SNS topic target from the target menu and select the topic that you had created in earlier steps.

Via API destination
-
Login to the Amazon Eventbridge dashboard. Navigate to Integration > API Destination > Connection.
-
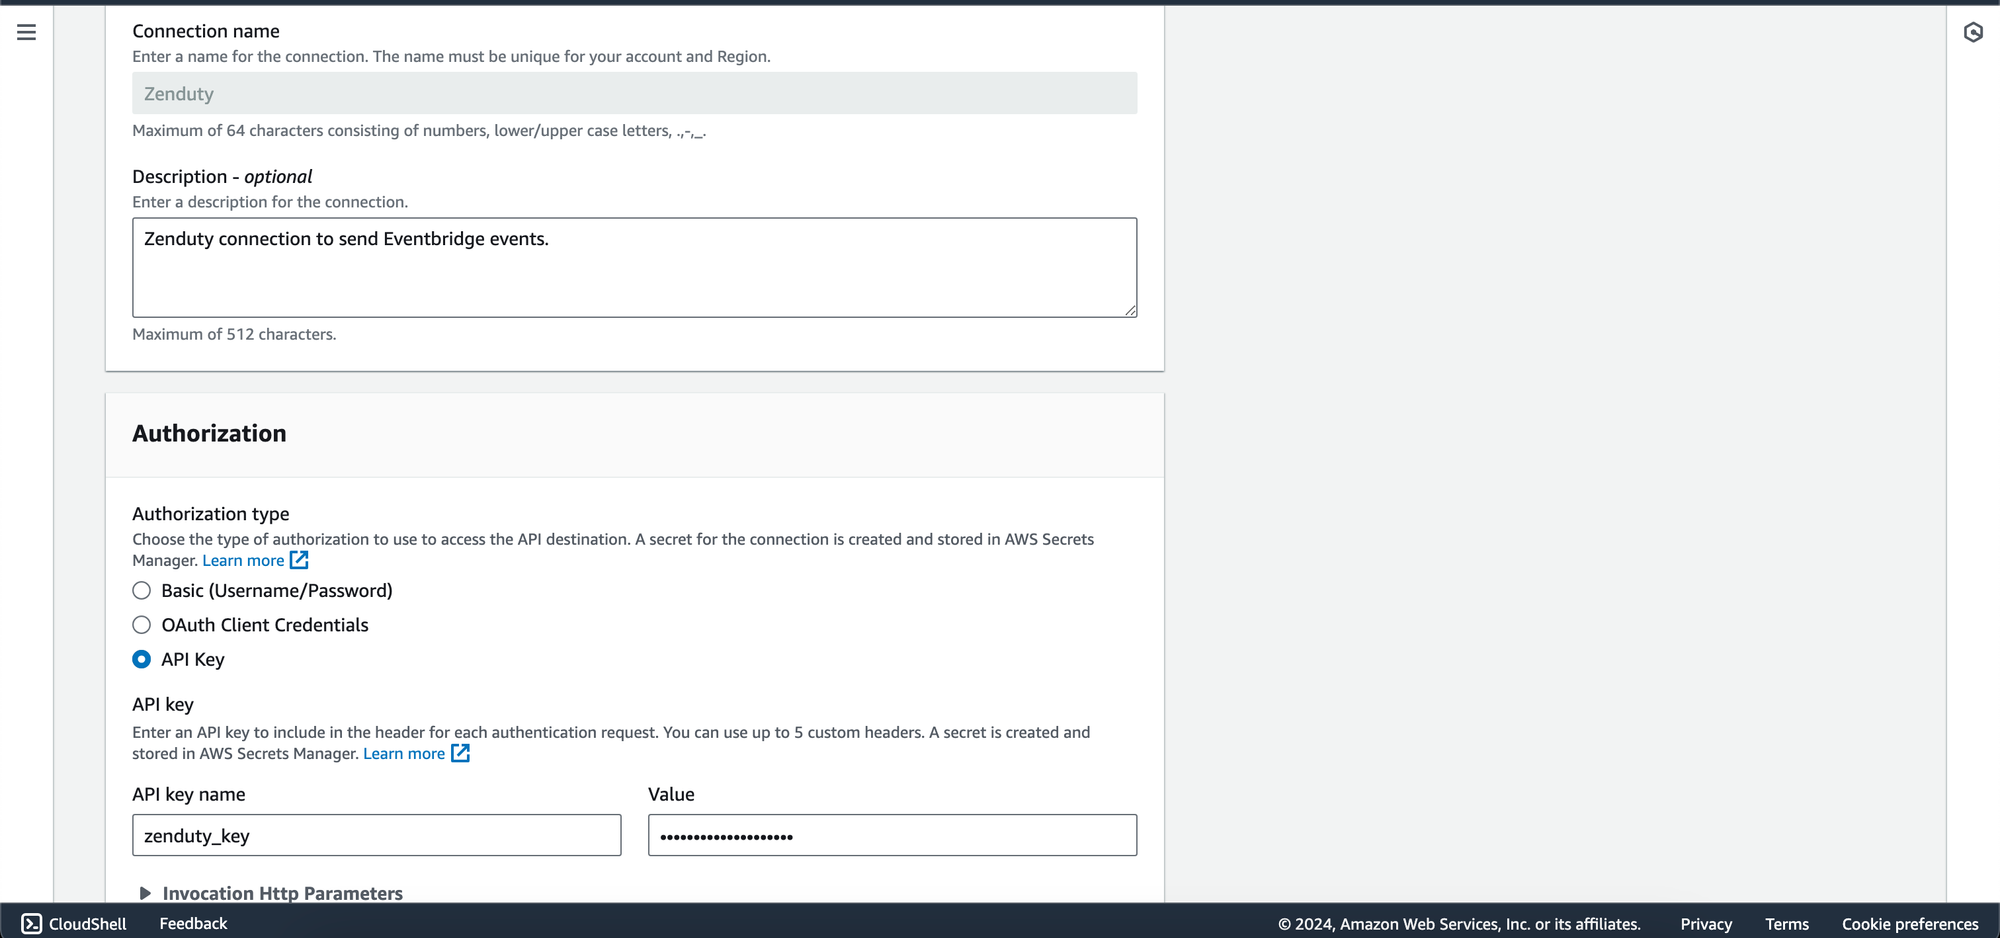
Click on Create connection. Provide Name and Description. Select "API Key" as Authorization and "Other" as Destination type. Provide "Zenduty_key" as the API key name and the Integration Key which you copied earlier from Zenduty as Value. Click on Create to create the connection.
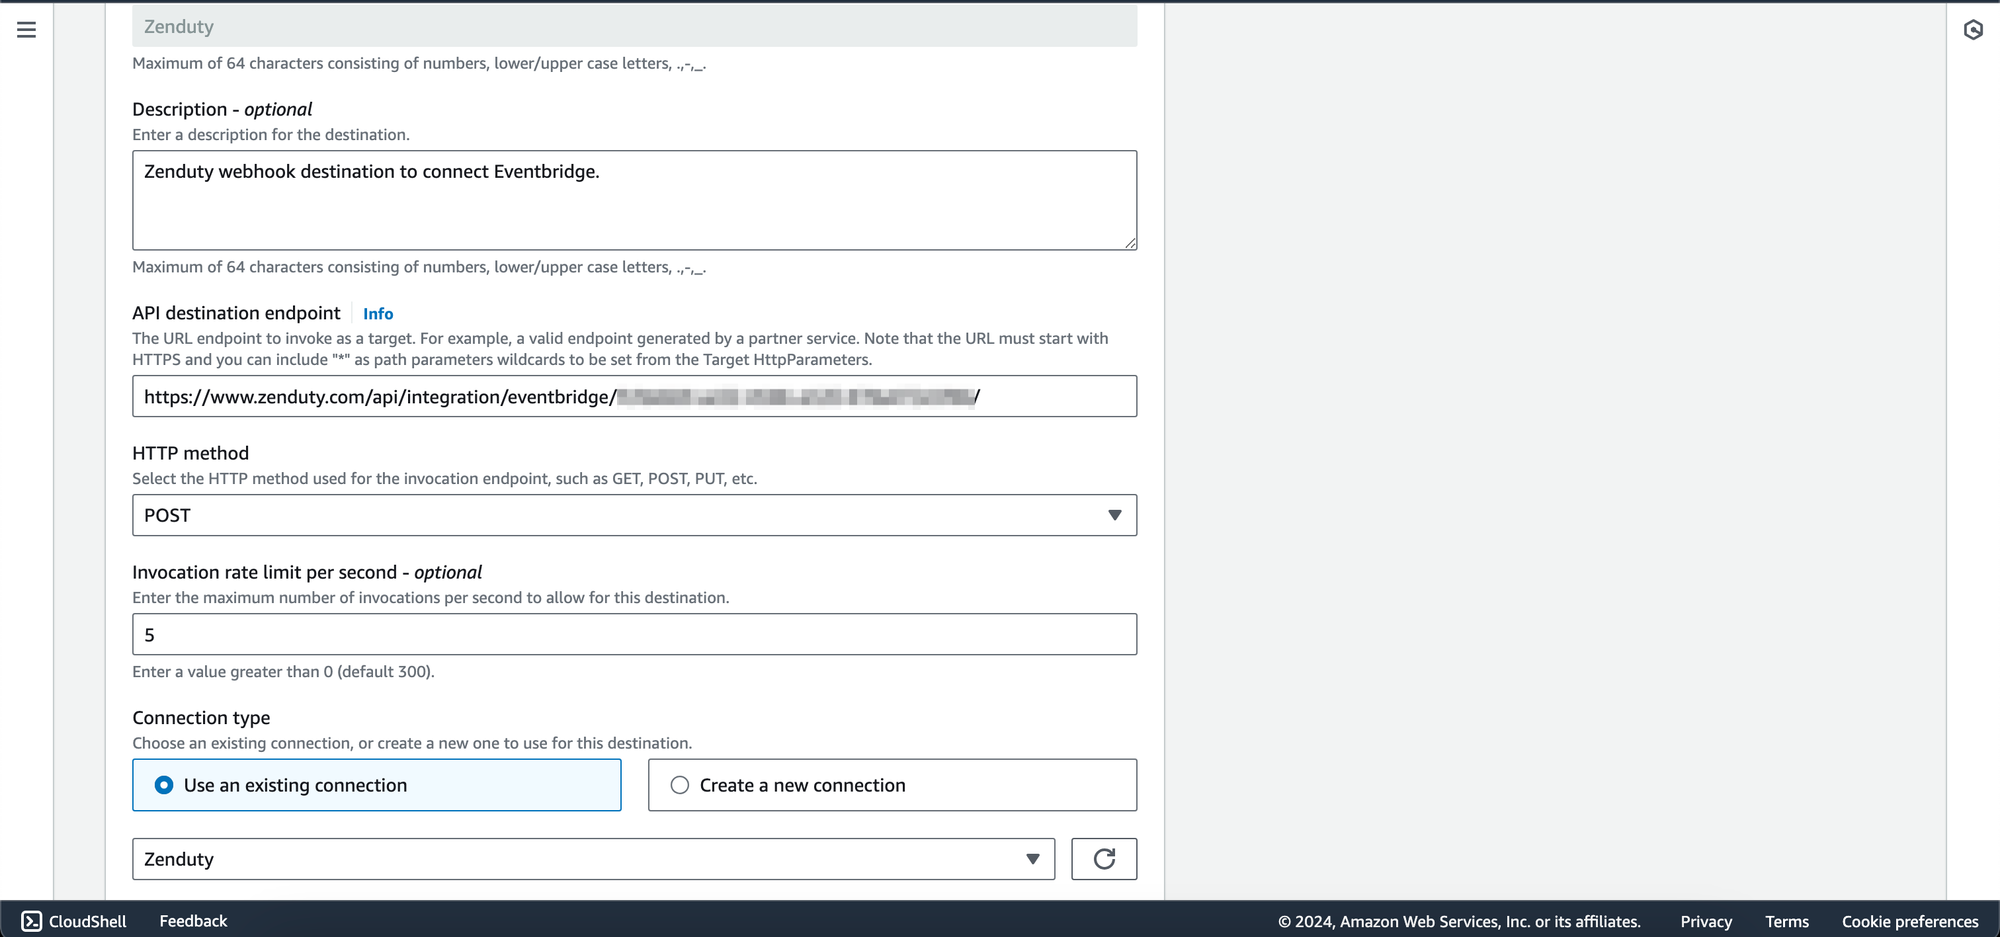
- Navigate to API Destination. Click on Create API destination.
- Provide Name and Description. For the "API destination endpoint", paste the webhook URL you copied earlier from Zenduty and select POST as the HTTP method. Enter 5 as the Invocation rate limit per second.
- Select "Use an existing connection" and select the connection you created in the earlier steps. Click on Create.
Zenduty is now integrated with EventBridge. It will create an incident for each event from EventBridge.